Tag Archives: Baking

A hint of tang, a hint of honey…….A cakey ode to our 40’s!!

Standard

My Mom, has what in my family we call the ‘Recipe Book Graveyard’. She loves to buy different recipe books, especially those featuring the varied regional cuisines of India. So we have Parsi cookbooks and Bengali cookbooks, recipe books of the Konkanastha Brahmins as well as those of the Goans, cookbooks featuring Marwari cuisine as well as a whole variety of books written by Indian TV Chefs. However not one recipe from any of them has ever been tried out.They are relegated to the ‘Recipe Book Graveyard’ situated near my Dad’s ‘Telephone graveyard’….well that’s another story all together……so lets just stay on track.

This tendency to buy recipe books and just read them, not try a thing or try out something that was merely a hint of the original, comes to me, I believe, in a gene from my Mom.

I am not a strict follower of recipes. Wayward in many ways, I loathe following recipes…..and I don’t. Yet, most often than not, I strike success, brought about by another gene, also inherited from my Mom…..talent in the cooking department.
As a subscriber to the BBC Good Food Magazine, India , I enjoy reading the magazine, marvel at the photography and often plan what to cook. But never ever end up cooking anything from the magazine.
My son J, whined and whinged and flung back at me all the lectures we give him about valuing and making use of all that he gets/buys. “Well, Ma……YOU NEVER make anything from your Good Food Magazines!!

So Mama, that’s ME, slunk away, tail between legs……to cook….following a recipe from the magazine.

I searched in some of the latest issues and found the right recipe for me to follow. A Cake. An Orange and Almond Cake.

This cake was perfect. It looked stunning and was so different to anything I had baked before. I had, of course, previously done a Pineapple Upside down. But in this one, I liked the use of honey and orange rind (which is a flavour I am shamelessly partial to), as well as ground almonds in the batter!! Almonds, oranges, honey and of course eggs, how much more goodness could a girl wish for?

As I ate this cake and savoured every bite, I realised I really liked it. Every new mouthful revealed something different. Honeyed sweetness, followed by the bitterness of the orange rind, the nutty texture of the almond and the tang of the oranges. This is such a ‘grown-up’, ‘ adult’ cake. Yet my youngest, 8-year-old D, particularly liked it. She thought it looked stunning and was supremely delicious. Heaving a sigh of relief, that I had spawned children with superior taste buds thus feeling rather superior myself, I continued nibbling.

As I nibbled, savoring each bite….(think wine connoisseur swirling the glass of a particularly prime vintage and you’ll get the picture), I couldn’t help thinking about my bunch of friends. Wonderful women who have either already turned 40 or will be doing so over the next year or two…..and one very lovely 30-year-old who fits in with the rest of the ‘oldies.’ We are all stunning….and sunny. Nutty? Oh yeah….and love it that way. The hint of the rind, a reminder of another facet of our personality…..forthrightness and honesty….often thought of as cattiness. If that be so then MEOW!! But the citrus hit reminds me of all the spunk and ‘devil may care attitude’ that comes only with the age and I’d like to think…AHEM….maturity.

So this one is for all my lovely friends and family as well as all the women out there….who have embraced their forties and rock on with style and panache, wind-blown hair streaked with grey and the confidence to care a damn about whether the grey shows through or not. Who laugh so heartily not worried whether we look like a jackass but confident that any smiling, laughing face is gorgeous, neither does the thought of laugh lines cross our minds.

“We’re not 40, just 18 with 22 years experience.”

Go on try this one….its full of character and its sure to leave an impression on you just as much as it does on everybody.

Orange almond cake

ORANGE AND ALMOND UPSIDE DOWN.(adapted from the BBC Good Food Magazine)

4 Medium sized Oranges
6 tbsp honey
200 gm butter + extra for greasing
200 gm brown sugar
200 gm flour
2 1/2 tsp Baking powder
100 gms ground almonds
4 eggs.

METHOD:

* Pre heat oven to 180 deg C.

orange cake Jan 2013 015* Finely grate the zest from two oranges.

* Peel the skin of all the oranges using a serrated knife.

* Cut the oranges into thick slices.

* Grease a 9 inch round baking pan. Drizzle the honey all over making sure that it covers the entire bottom.

*Arrange the best slices of orange all over the bottom. car rally & orange cake Jan 2013 009

* Finely chop the remaining orange slices.

* Cream butter and sugar till its light and fluffy.

* Bit by bit add in the egg a little at a time, ensuring that its incorporated into the butter/sugar mix before adding some more.

* Sieve flour and baking powder together and add in the ground almonds.

* Fold the flour and almond mix into the wet mix, adding in the chopped oranges halfway through.

* Pour the cake batter over the Oranges and honey in the tin.

*With a spatula or wooden spoon, make a depression in the centre of the cake.This will help the cake rise evenly when baked and not ‘dome’.

* Bake at 180C for 50-60 mins or till a skewer inserted into the centre comes out clean.

* Allow it to settle for around 5 minutes before turning it out.

* Serve as it is or drizzled with honey.

iPhone pics....New year- Pondy Rally 003

Personally, I prefer the flavour the next day.

But I’m sure you know your own likes.

“At the age of 20, we don’t care what the world thinks of us; at 30, we worry about what it is thinking of us; at 40, we discover that it wasn’t thinking of us at all.”

So sit back with a piece of this cake and savour the sweet, the bitter, the tang and nuttiness……embrace it’s flavours and personality.

ENJOY!!

Entering this into the Tea Time Treats Citrus Challenge hosted by Lavender and Lovage and What Kate Baked.

Tea-Time-Treats-Logo1-300x300[1]

Why Dulce de Leche is Doubly Sweet for Me…..

Standard

A couple of years ago a very close friend of mine, Unnati, suggested I join an online baking club. I was skeptical, very very skeptical. But thought there’s no harm, I can always leave if I don’t like the way it works out.

Unnati, an architect by profession is a passionate cook and a budding wine maker. Check out her blog here. Along with some old friends and a couple of Indian woman from around the world we formed the ‘Flour Power Club.’

The objective was very simple. Each month one of the members has to post a baking challenge for the others to complete. The person posting the challenge should have never made the challenged recipe ever before.(even if the others had done so)

The very first challenge set was ‘Banoffee Pie’……a classic, surely, but one that did not sit well with me at all. 

I HATE bananas….period. There’s no more to say.

I was really disappointed, upset even. Regretfully, I wrote to the member who posting the challenge explaining why I was unable to participate in the challenge. She very kindly wrote back urging me to try at least the most important component of the pie, the DULCE DE LECHE…….

…….and I did! Not just the version she had posted, which involved boiling a tin of condensed milk for 3 hours, but the one which involved boiling milk, sugar and vanilla over a stove for the same amount of time till it thickened and caramelised.     

I did make a pie….not Banoffee….but ‘Peachoffee’, substituting the bananas with peaches.

Image 

If you are a regular reader of my blog, you will know by now that food has always been part of my life. I have assimilated all my food knowledge as if by osmosis from home and topped it off and sealed it in when I studied food as part of my degree in Hotel Administration and Food Technology.

However, once I got married and moved to Chennai, I lost all interest in cooking, hating to cook the daily meals and ordering in food whenever we had guests.

But joining the Flour Power Club and my first brush with Dulce de Leche, changed all that.

Something piqued my curiosity to find out which method of preparing Dulce de Leche would give a better result.

Needless to say that the one that required that milk and sugar be boiled down to a caramel, beat the condensed milk dulce hollow. The colour was richer and the flavour so much deeper and more intense.

I am a firm believer that anything that takes time, that is gently simmered and needs your attention gives results far superior to the easy, quick fix methods.

As a true lover of food, not just good food, but food that is soooo good your taste buds just pop…..requires time, love and attention.

This was a lesson I learnt that day…..the day of the double dulce de leche.

But this trial also got me back on the foodie bandwagon…..and since then I am back with gusto in the kitchen churning out many delicacies…..but always full of flavour and goodness.

So for these reasons Dulce de Leche always strikes a chord with me……and whenever I make it, I always eat a dollop-full from a teaspoon…..relishing the intensely caramel-ly hit!

All with 3 simple ingredients…

So here is the recipe for Dulce de Leche I use:

1 lt Milk

1 1/2 cup granulated sugar

1 vanilla bean (split)

1/2 tsp baking soda

Method:

Bring the milk, sugar and baking soda to boil without stirring.

Remove the foamy layer that forms on top.

Add the vanilla bean at this point and simmer the mixture for an hour.

You will find that the colour will begin to deepen and the mixture thicken to a thick silky caramel.

I do not stand over the mixture but occasionally stir it. Only at the end when the caramel is thickening, ensure that you stir it to prevent it from burning.

Enjoy your dulce de leche in brownies, ice cream, ribbon it through cake batters, use it on toast or pancakes, or even in a mousse.

Here is the Dulche de Leche in various stages of caramelization:


This slideshow requires JavaScript.

Don’t Forget the Frozen Pizza Dough!

Standard

Remember when I made the whole wheat pizza dough?

If you don’t or are reading this blog for the first time….check it out here.

I froze a part of  it for later.

Well, the kids are back at school and I’m back to dusting the cobwebs off my creative brain cells, urging them to somewhat creakily wake up and think up interesting goodies to pack for lunch.

5 am…..Y A A AWN and S..T..R…E…C…….H………………

Desperate scramble for my morning jolt……a cuppa coffee…….

Light bulbs pop……hey there is some frozen pizza dough!!

I took the dough out and left it to thaw and rise again.

(You could leave it in the fridge the previous night)

Using the pizza sauce which I always have on hand, frozen, I sautéed some mushrooms, corn and leftover grilled chicken and mixed it with the pizza sauce.

Cut the dough into equal pieces….as many as you require.

Roll it out and put some of the filling along with some cheese.

Fold over and seal by brushing a little water or egg around the edges and pressing

with the help of a fork.

If you look carefully, you will notice that I have left a small corner unsealed.

This allows for the steam to escape and prevents the bread from splitting while baking.

Cover with a damp cloth and leave it to rise for @ 10-15 minutes.

Brush with egg wash before baking.

Bake at 200 deg C for 10 min or till firm and golden.

….And TAA DAAA…….

Perfect little CALZONE for the lunch box!  Delicioso!!!

CALZONE literally meaning a stocking or trouser is nothing but a folded pizza.

It’s filling consists of ingredients similar to pizza toppings.

My 7-year-old only eats a Pizza Margherita and hates any toppings on her pizza.

This is a great way to stuff all kinds of veggies into a bun…..it’s not visible!

But considering that it is a ‘totally cool’ lunch…..it goes down with pride!!

So don’t forget that frozen pizza dough………….

I talked to a calzone for fifteen minutes last night before I realized it was just an introverted pizza. I wish all my acquaintances were so tasty.
”

Jarod Kintz, This Book Has No Title

The Need to Knead (Wholewheat Pizza Base)

Standard

The plan was pizza for dinner tonight.

Got my sauce done in the morning and planned to get the base done in the evening.

How I love to see the vibrant red sauce, so fragrant, simmering on the stove!

All food that needs to be simmered, slowly, patiently, intrigues me. Considering that by nature, I am not a patient person, I find this very interesting!

Soups, stews, simmering pots of stock and sauces, all have a special place in my foodie heart.

I love that the flavors intensify, bringing out multiple layers and interesting nuances.

Bread dough.….another favourite, is another ‘demand-er’ of tons of patience.

Yet this too, is me….all impatient me!

I love watching the yeast react with the sugar and bubble up……MAGICAL!

Watching the dough rise up and double in size……FASCINATING!

I love to knead, I find it mindfully MEDITATIVE.

That a tumble of flour, water, oil and yeast, rather messy looking, needs just a bit of kneading to turn into a smoothly polished ball of dough is fascinating.

Yet how much easier is it for me to do this, than knead gently into relationships with those around me.

My patience evaporates.

As I kneaded the dough for the base this evening, I could not help but dwell on this…..

……and work out my biceps at the same time. ; )

I had, for the longest time, been trying to zoom into a great wholewheat pizza base recipe…..I was really happy with the results of my experiment this evening.

The dough when baked was soft yet crusty on the edges, lending a beautiful texture to the pizza.

WHOLEWHEAT PIZZA BASE

( adapted from Oprah.com)

3 tsp fresh yeast

2 tsp honey

3 cups wholewheat flour

1 cup flour (maida)

2 tbs olive oil

2tsp salt

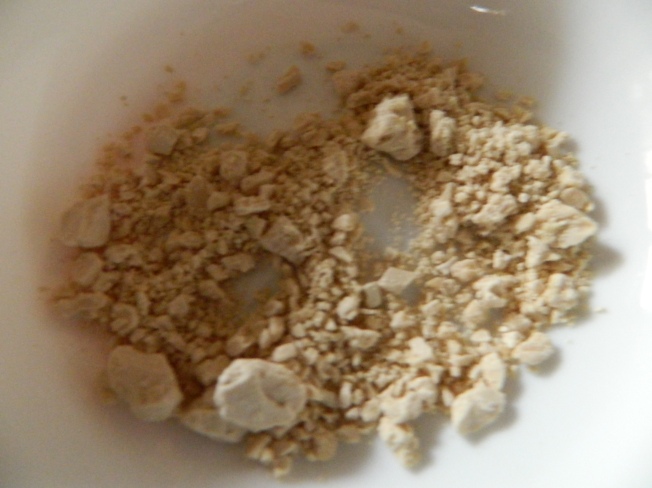
*Mix the yeast and honey in a bowl with @ 1/2 cup tepid water. Make sure you disperse the yeast completely.

Leave this yeast mixture aside and keep the other ingredients ready.

I prefer working directly on a clean kitchen counter.

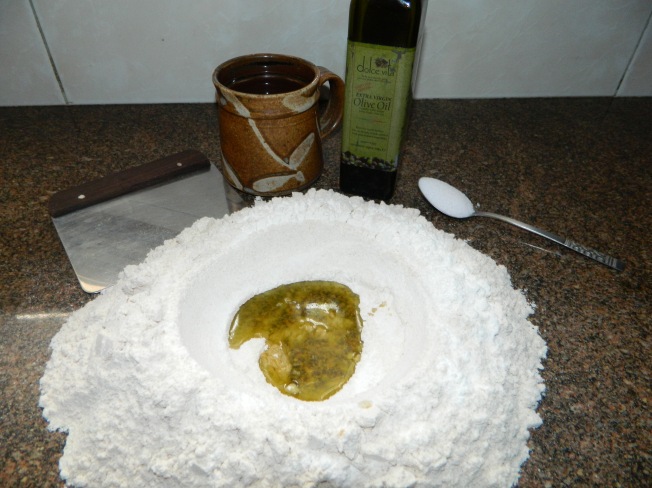
*Measure out the flour and make a well in the center.

*Pour the oil into the center of the flour.

*Check the yeast mixture. It needs to have bubbled on the surface.

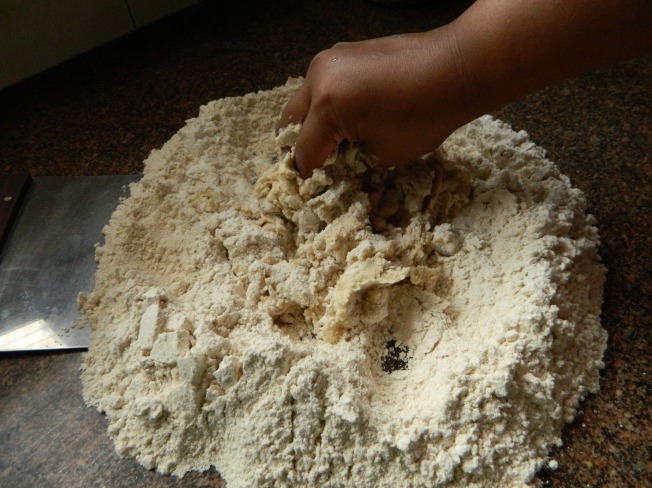
If it has, pour this into the well of flour and mix gently into the flour.

*Once you have mixed up the oil and yeast mixture with the flour, pour in the remaining water, bit by bit. Mixing well after each addition. (approx 1 cup)

Once you feel that you have a firm dough stop adding the water and begin to knead.

*Place your right hand to the top of the dough at a 12 o’clock position and your left at the 6 o’clock position.

Begin to knead with your right hand while holding the dough with the left. For some more tips click here.

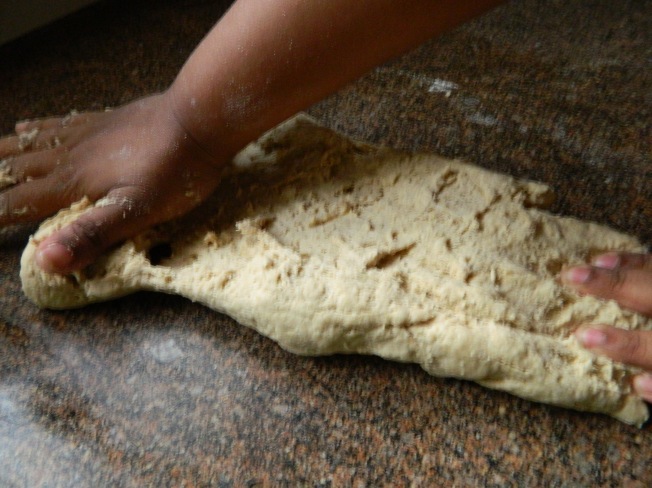
Roll the dough and continue this action till you find the dough has developed a smooth texture.

Note the picture above and the one below to notice the difference in textures.

By kneading, the gluten strands are strengthened allowing for a more uniform crumb.

*Roll into a ball.

*Keep the dough ball aside in a bowl to prove. Make sure you cover it with a damp kitchen towel.

*Once the dough has doubled in size, knock it back down by punching the dough and dispelling the air.

*Leave it to prove once again.

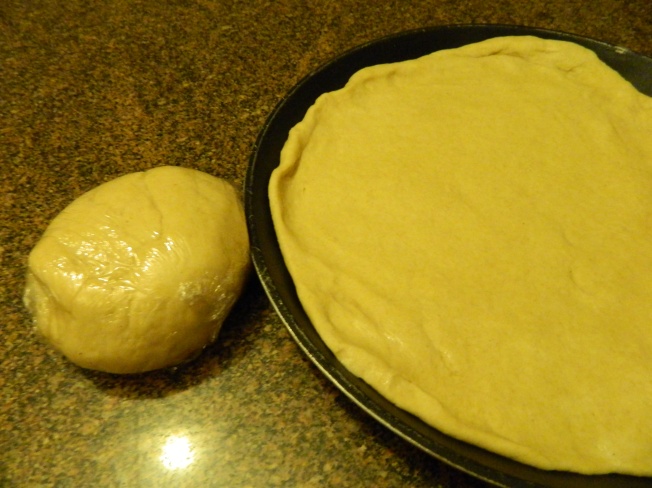
*Once it doubles in size again, knock it down and roll out into the desired base size.

*You can wrap the extra dough in cling film and keep it in the freezer to use at a later date.

* Allow it to prove for 5-10 mins and then add the pizza sauce and toppings.

* Bake in a preheated oven at 200 deg C for about 10 minutes.

To ensure that the dough is cooked, press gently. If there is a small depression it is not yet ready. Bake till the dough pops back up when pressed.

“Everyone is kneaded out of the same dough but not baked in the same oven”

Yiddish Proverb quotes

Loved this proverb…………leads to an interesting story from African mythology. Iyadola’s Babies.
Resource guide for Chennai:

Organic Wholemeal flour – Econut and ReStore. Pro organics or Letter Mantra Brands available in Nilgiri’s

Fresh Yeast – Nilgiri’s…..look in the refrigerated section.

A Surprisingly Healthy ‘Junk’ Meal

Standard

This wasn’t something I’d planned to blog about AT ALL.

But my slap dashing about in the kitchen this evening turned up gold!

I was thrilled and so were the kids.

Trying to tackle the 41+C temperatures in Chennai at the moment can really muddle up my foodie brain.

As I tried to plan our menus this morning, all I could think of for dinner today was something that did not require too much effort and time in the ‘roasting’ kitchen.

So I pulled out a pack of frozen chicken breasts, flattened it with a mallet and marinated it very simply with:

Salt, pepper, mustard, olive oil, Worcestershire sauce and a splash of ketchup.

Put it away to rest in the fridge and thought……”what the heck, I’ll tackle that in the evening when it’s cooler.”

This evening, extremely disgruntled at having missed my daily swim, I decided that ‘Burgers and fries’ would be our dinner.

However the thought of the oily fries in this heat was not appealing at all, other than the guilt that I was offering my kids ‘junk’.

So I decided to experiment and bake a few fries.

I just used the McCain’s Frozen French Fries,


Spread them out on a baking tray,

drizzled some olive oil

and popped it in an oven pre-heated to 200C.

and baked it for 30 minutes.

The result was fabulous! I had crispy golden fries, without having to fry them.

Try it ……it was just superb.

Oven Baked French Fries, Crispy and Golden

The chicken breast, I popped under the grill for @ 10 minutes.

I turned them over midway so that each side was grilled for 5 minutes.

After toasting the burger buns, I topped them with

Lettuce, chicken breast, cheese, balsamic grilled onions (see recipe below), slices of tomato and gherkins.

It was delicioso!

Finger lickingly good.

( For my 7 year old, I made a wrap with the grilled chicken)


Grilled Onions

2 onions

1tbs balsamic vinegar

1tsp sugar ( brown or white)

1 tsp olive oil


Inspired by a fellow blogger Stephanie from Modern Christian Woman who made slow roasted raspberry balsamic onions today, I decided to use balsamic vinegar instead of my usual Worcestershire sauce in the grilled onions.


You can see Stephanie’s recipe at:

http://modernchristianwoman.wordpress.com/2012/05/19/slow-roasted-raspberry-balsamic-onions-and-garlic/


Although I call them ‘grilled’ onions, I just do them on the stove top, in a pan.

Heat the oil and saute the onions. Add in the sugar, balsamic vinegar and a pinch of salt.

Saute over low heat till the onions are translucent and just beginning to caramelize.

Use it in burgers, sandwiches or hot dogs.

Now if only I could source some wholewheat burger buns…..my ‘healthy junk’ would be truly healthy.


Resource guide for Chennai:

McCains French Fries – Nilgiri’s and Mercado.

Balsamic Vinegar, various brands – Nilgiri’s and Mercado

Worcestershire Sauce, Lea and Perrins – Nilgiri’s, Mercado, Amma Naana

Boneless Chicken Breast, Suguna Protein – Nilgiri’s

Burger Buns – Nilgiri’s, Winners Bakery, French Loaf

Olive Oil – Econut

Gherkins – Tify

Lettuce – Veggie vendors outside Nilgiri’s, Besant Nagar, Cathedral Road and Indira Nagar.