Tag Archives: Lunchbox idea

Basil……A Yarn and a Recipe.

Standard

My kids love Pasta Pesto. It is a lunch box staple, which I have always prepared using the bottled Organic Pesto from Auroville.

However on my recent visit to Econut for my Organic provisions, I struck it lucky with a big bag full of fresh basil. I just couldn’t resist. I picked up a bag full of organic walnuts and extra virgin olive oil as well.

Although pesto is traditionally made with Basil, pine nuts, garlic, olive oil and a hard cheese like Parmigiano Reggiano or Pecorino, I decided to do a more economical version with walnuts and skipped the cheese altogether.

I guess here in India one would say I made a chutney.

Holy Basil or Tulsi is revered in India in every Hindu household, especially in those of Vishnu devotees.

Read this wonderful story from Hindu Mythology about the Tulsi plant here.

However the Christians, too, consider Basil holy especially the Greek Orthodox Church.

St.Helena, was born somewhere in the region of modern-day Turkey. Although just a stabularia or inn-keeper she married Constantius I Chlorus in 270 BC. They had a son Constantine.

As Constantius became co-regent or Ceasar, he had to, for political gain, forsake Helena and marry the step-daughter of the Emperor Maximinius Herculius.

Disgraced in a court that was full of intrigue and murder, Helena never fought her rival but faded into obscurity till her own son Constantine became Emperor. She then was bestowed with the title of Augusta or Empress.

Constantine was the first Roman Emperor to convert to Christianity. Legend says that he had a dream of a burning cross with a message that he should ‘in this sign conquer’. So he did, earning control over western Europe.

They say it was Constantine’s influence on his mother that made her too, embrace Christianity. She mingled freely with worshippers did many acts of charity and released prisoners too.

Although she was pretty advanced in age, Helena set out on a pilgrimage to Palestine, visiting Bethlehem, Jerusalem and Sinai. She built many churches and continued her charity work.

She was very keen to find the ‘True Cross’….the cross on which Jesus had been crucified.

She had been searching for many days, when on a barren hill outside Jerusalem she noticed a sweet-smelling plant. That plant happened to be Basil. She gave orders that the area under the plant be excavated and found the True Cross.

So to this day, especially in the Greek Orthodox Church,Sweet basil is used in the preparation of Holy water.

Two religions, both have reasons why this plant is so special…..and there are many more cultures that venerate the Basil. In many other cultures like Mexico, Romania and Italy it is associated with love.

Not just a ‘holy herb’, but also one which is full of health benefits!

It is one of the most highly regarded herbs in Ayurveda.

“Scientific research offers impressive evidence that Tulsi (basil) reduces stress, enhances stamina, relieves inflammation, lowers cholesterol, eliminates toxins, protects against radiation, prevents gastric ulcers, lowers fevers, improves digestion and provides a rich supply of antioxidants and other nutrients. Tulsi is especially effective in supporting the heart, blood vessels, liver and lungs and also regulates blood pressure and blood sugar.Dr. Ralph Miller, former Director of Research for the Canadian Dept. of Health and Welfare.

Makes me wonder at how religion often guided people towards what was good for them, not just spiritually but also physically and emotionally. The environment, too, benefited from many of the old rituals which ensured its protection.

Although I am not a regular church goer, my deeply Catholic upbringing, ensures that I have a prayer on my lips often. From this ability to just utter a silent prayer, I drawer a lot of strength. It has a calming meditative value about it which I treasure.

;

So here is the recipe I used to make Basil and Walnut Pesto:

Adapted from http://cookieandkate.com

Ingredients

  • 2 lightly packed cup of basil
  • 2 garlic clove, peeled
  • 1/2 cup walnuts, lightly toasted
  • 1/2 cup extra-virgin olive oil
  • salt, to taste
  • squeeze of lemon juice
Instructions
  • Over medium high heat, toast the walnuts until fragrant, about three to five minutes.
  • Wash and dry the basil leaves
  • In a food processor, combine the basil, walnuts and garlic.
  • Pulse while drizzling in the olive oil. Do not over mix as I felt the pesto gets darker.
  • Remove the mixture from the processor and pour it into a bowl. Stir in salt and a squeeze of lemon (optional), to taste.

;

I did not add in the cheese as I felt it would keep better this way.

When I made it for lunch, I added some grated cheese to the ready dish.

  • Pesto freezes well, so you can make a larger quantity and freeze for later use.
  • Traditionally made by hand in a mortar and pestle…..I did not have one large enough to take this quantity so I just made it in the mixie.
  • Make the pesto as soon as you get fresh basil.
  • I replaced the traditional pine nuts with walnuts…..it’s just as tasty.

Use it as:

  • A pasta sauce.
  • Marinade for grilled fish of chicken.
  • Stirred as a flavouring into soups.
  • Sandwich spread.
  • Healthy pizza sauce alternative.

Do you use pesto in any other way??

I’d love some new ideas

Don’t Forget the Frozen Pizza Dough!

Standard

Remember when I made the whole wheat pizza dough?

If you don’t or are reading this blog for the first time….check it out here.

I froze a part of  it for later.

Well, the kids are back at school and I’m back to dusting the cobwebs off my creative brain cells, urging them to somewhat creakily wake up and think up interesting goodies to pack for lunch.

5 am…..Y A A AWN and S..T..R…E…C…….H………………

Desperate scramble for my morning jolt……a cuppa coffee…….

Light bulbs pop……hey there is some frozen pizza dough!!

I took the dough out and left it to thaw and rise again.

(You could leave it in the fridge the previous night)

Using the pizza sauce which I always have on hand, frozen, I sautéed some mushrooms, corn and leftover grilled chicken and mixed it with the pizza sauce.

Cut the dough into equal pieces….as many as you require.

Roll it out and put some of the filling along with some cheese.

Fold over and seal by brushing a little water or egg around the edges and pressing

with the help of a fork.

If you look carefully, you will notice that I have left a small corner unsealed.

This allows for the steam to escape and prevents the bread from splitting while baking.

Cover with a damp cloth and leave it to rise for @ 10-15 minutes.

Brush with egg wash before baking.

Bake at 200 deg C for 10 min or till firm and golden.

….And TAA DAAA…….

Perfect little CALZONE for the lunch box!  Delicioso!!!

CALZONE literally meaning a stocking or trouser is nothing but a folded pizza.

It’s filling consists of ingredients similar to pizza toppings.

My 7-year-old only eats a Pizza Margherita and hates any toppings on her pizza.

This is a great way to stuff all kinds of veggies into a bun…..it’s not visible!

But considering that it is a ‘totally cool’ lunch…..it goes down with pride!!

So don’t forget that frozen pizza dough………….

I talked to a calzone for fifteen minutes last night before I realized it was just an introverted pizza. I wish all my acquaintances were so tasty.
”

Jarod Kintz, This Book Has No Title

Aside

I cannot believe that it has been a month since I began blogging!

What started as a lark, with absolutely no plan, has panned out beautifully and I feel truly blessed.

I was new to blogging….still am, but I enjoy the lessons that it teaches me everyday.

In this one month, other than the first day, I’ve had hits on my blog everyday. Ranging from just 2 hits on a day to 165 on another and I enjoy watching the blog statistics.

It humbles me to see that visitors from countries like China, Colombia,Spain, Germany, Czech Republic, Ukraine, Japan and Philippines stop by. Places where I do not know anybody. Thank you for seeing something in my posts that interests you and ‘liking’ my posts.

Of course family and friends from India, Bangladesh, Sri Lanka, Australia, New Zealand, Great Britain, Canada and the US who take time to stop by and comment …..Thank you.

To those of you who have called, messaged,mailed and commented…..thank you….I thrive in your constant encouragement.

To those who have shared my blog on FB, Pinterest, Twitter…..please keep doing so, you guys have driven many more to my blog. Thank you and Mwah ❤

To my fellow bloggers,  I know you only through your writing, and you, me, through mine.

Although its only been a month I can see a little circle forming, each of us encouraging the other.

To me this is the most profound part of blogging.

The ability to see and appreciate the beauty of another’s writing, approach, humor and candor, is  all encompassing…..bringing out appreciation, encouragement, awe and inspiration.

 This was nothing I could ever imagine as a non-blogger.

I thank you all again and again…….

But here I need to mention:

Deeba Rajpal of   Passionate about Baking.  The fact that an Indian living in India could have  such a beautiful blog was inspiring. Deeba very kindly answered my questions about recipe copyrights and I was on my way. Check out her blog for fabulous recipes and food photographs.

Thank you Deeba.

Aarti Mahesh, who’s casual comment, urging me to start a blog, wormed it’s way into my head and stayed there gnawing away till I did start.

My sister Mary-Lou who sent out a zillion emails to every one she knew telling them about my blog…..I’m sure she was single handedly responsible for  the 165 hits on day 5.

Sindu Sanjith…..I guess I could call you my most ardent follower…..Thank you for trying out so many of my recipes and posting them on FB…..I truly appreciate the effort.

Charmaine, Kuki….you too, your posts brought me many more hits.

My son J who helps me with the photo’s, an amazing creative writer, he is also my critic.

My hubby V and daughter D who put up with my late nights at the computer and patiently wait for their meal while I get the photo’s done!!

My parents who have instilled in me this love for food…….all my foodie knowledge was picked up by osmosis at home.

My Mama has also tried really hard to figure out the computer just to read my blogs!

There are so many of you to name…..so I will stop here….but THANK YOU ,THANK YOU, THANK YOU.

Today is also the day MOJO   started…….Mostly Organic by Jo.

Every Monday I bake mostly organic goodies which friends and family can pick up.

 Today we had Wholewheat Carrot and Apple Cupcakes and Mix fruit and nut Oatmeal Cookies.

Thanks to every one who did order and appreciated my products.

I’m happy to say that we supplied Redwood Montessori School who are committed to offering their children fresh organic produce.

June 11th 2012…..MWAAH!

A Month since JosMojo……and a new beginning….MoJo

The Need to Knead (Wholewheat Pizza Base)

Standard

The plan was pizza for dinner tonight.

Got my sauce done in the morning and planned to get the base done in the evening.

How I love to see the vibrant red sauce, so fragrant, simmering on the stove!

All food that needs to be simmered, slowly, patiently, intrigues me. Considering that by nature, I am not a patient person, I find this very interesting!

Soups, stews, simmering pots of stock and sauces, all have a special place in my foodie heart.

I love that the flavors intensify, bringing out multiple layers and interesting nuances.

Bread dough.….another favourite, is another ‘demand-er’ of tons of patience.

Yet this too, is me….all impatient me!

I love watching the yeast react with the sugar and bubble up……MAGICAL!

Watching the dough rise up and double in size……FASCINATING!

I love to knead, I find it mindfully MEDITATIVE.

That a tumble of flour, water, oil and yeast, rather messy looking, needs just a bit of kneading to turn into a smoothly polished ball of dough is fascinating.

Yet how much easier is it for me to do this, than knead gently into relationships with those around me.

My patience evaporates.

As I kneaded the dough for the base this evening, I could not help but dwell on this…..

……and work out my biceps at the same time. ; )

I had, for the longest time, been trying to zoom into a great wholewheat pizza base recipe…..I was really happy with the results of my experiment this evening.

The dough when baked was soft yet crusty on the edges, lending a beautiful texture to the pizza.

WHOLEWHEAT PIZZA BASE

( adapted from Oprah.com)

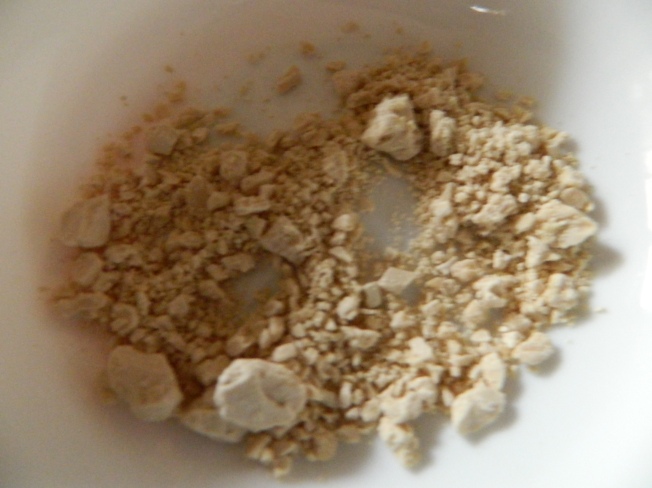
3 tsp fresh yeast

2 tsp honey

3 cups wholewheat flour

1 cup flour (maida)

2 tbs olive oil

2tsp salt

*Mix the yeast and honey in a bowl with @ 1/2 cup tepid water. Make sure you disperse the yeast completely.

Leave this yeast mixture aside and keep the other ingredients ready.

I prefer working directly on a clean kitchen counter.

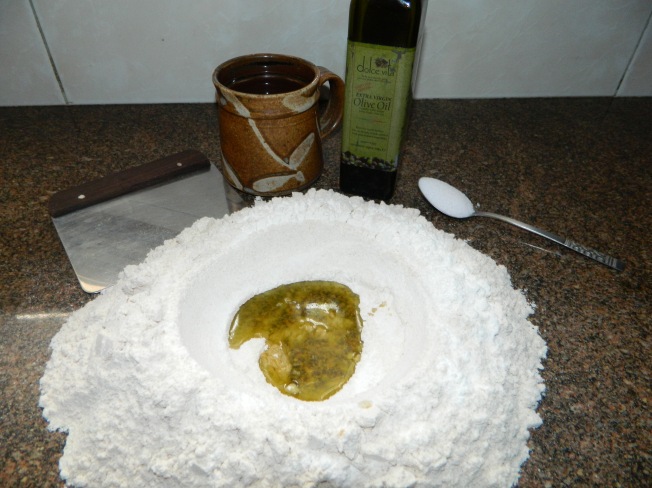
*Measure out the flour and make a well in the center.

*Pour the oil into the center of the flour.

*Check the yeast mixture. It needs to have bubbled on the surface.

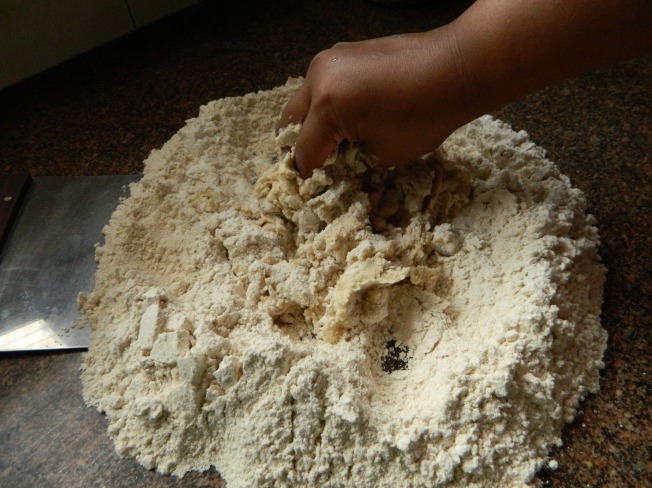
If it has, pour this into the well of flour and mix gently into the flour.

*Once you have mixed up the oil and yeast mixture with the flour, pour in the remaining water, bit by bit. Mixing well after each addition. (approx 1 cup)

Once you feel that you have a firm dough stop adding the water and begin to knead.

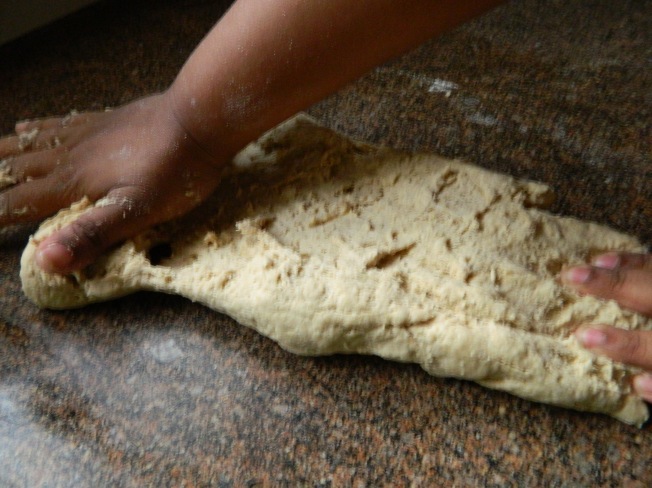
*Place your right hand to the top of the dough at a 12 o’clock position and your left at the 6 o’clock position.

Begin to knead with your right hand while holding the dough with the left. For some more tips click here.

Roll the dough and continue this action till you find the dough has developed a smooth texture.

Note the picture above and the one below to notice the difference in textures.

By kneading, the gluten strands are strengthened allowing for a more uniform crumb.

*Roll into a ball.

*Keep the dough ball aside in a bowl to prove. Make sure you cover it with a damp kitchen towel.

*Once the dough has doubled in size, knock it back down by punching the dough and dispelling the air.

*Leave it to prove once again.

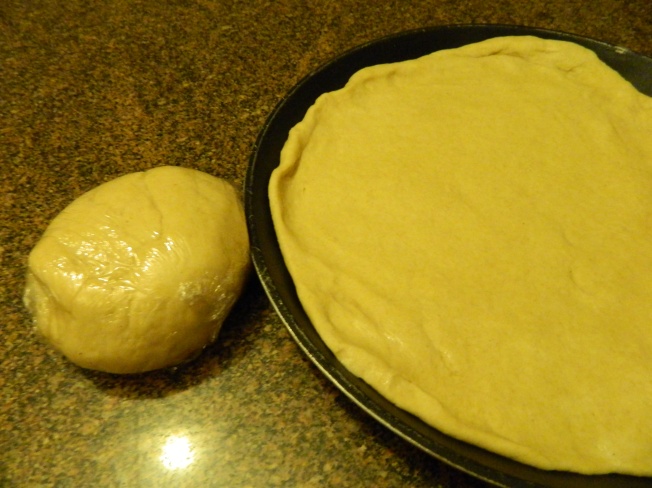
*Once it doubles in size again, knock it down and roll out into the desired base size.

*You can wrap the extra dough in cling film and keep it in the freezer to use at a later date.

* Allow it to prove for 5-10 mins and then add the pizza sauce and toppings.

* Bake in a preheated oven at 200 deg C for about 10 minutes.

To ensure that the dough is cooked, press gently. If there is a small depression it is not yet ready. Bake till the dough pops back up when pressed.

“Everyone is kneaded out of the same dough but not baked in the same oven”

Yiddish Proverb quotes

Loved this proverb…………leads to an interesting story from African mythology. Iyadola’s Babies.
Resource guide for Chennai:

Organic Wholemeal flour – Econut and ReStore. Pro organics or Letter Mantra Brands available in Nilgiri’s

Fresh Yeast – Nilgiri’s…..look in the refrigerated section.

Satay Supreme

Standard

Satay has been one of those things that everyone in my family loves.

My 7 year old D, has called it ‘Chicken on a Stick’, forever. Its always been a sure thing to get her to eat whenever we are out for a meal.

Yet for no particular reason, I had never attempted to try it out myself.

My first brush with Satay was when I was about 10 years old and had travelled with my Dad and siblings to Singapore for a Food trade fair.

We tried many varieties of food on that trip.

One that exposed and refined our palates to receive a variety of flavours as we grew up.

We went to a place called ‘Satay Club’, a hawker center which had the most finger-lickingly delicious Satay on offer.

Photo Credits Kirsten Dixon A Singapore Hawker Centre

;

Being true blue Bombayites, hawker centers was right up our street.

But that was many moons ago.

Many, mannnnnyyy moons ago…….

We still enjoy our Satay. Hubby has even packed some from Malaysia and brought it back home for us to relish.

It is one of those dishes, I’m sure we all order at restaurants and relish at parties.

Yet for some reason, if you are like me, we are quite content to order it and have no reason at all to attempt making it.

Around 3 weeks ago, I had a strange compulsion to try out Satay. Since then I’ve made it thrice, always with great results.

I realised that it is soooo versatile.

My first attempt was just that…..an attempt. But it was delicious.

My second was when I had planned on Phad Thai for dinner. A friend decided to drop in that evening and I needed to a quick dish to add to the menu………Satay it was.

My third was for a picnic by the beach. I thought this would be a great crowd-pleaser along with chilled beers.

And what do you know, Satay is my new fav dish in my repertoire.

I’m sure it will be yours too.

Only once you have actually made it will you realise just how easy it actually is.

So JUST DO IT!!

;

Chicken Satay with Peanut dipping sauce.

( Adapted from About.com)

8 Boneless Chicken Breasts

40-50 wooden skewers

For the marinade:

1/4 cup chopped lemon grass (white portion only)

3 Shallots or Sambar onions

3 cloves garlic

1tsp chilli powder

1 ” ginger,chopped

2 tbs corriander powder

2 tsp cummin powder

1 tsp turmeric

3 tbs dark soya sauce

4 tbs fish sauce

5 tbs brown sugar

2 tbs vegetable oil

;

The first thing you need to do is to soak the wooden skewers in water. This is really important as if you don’t they will burn while grilling.

Cut the chicken breast into long strips. ( medium thin)

Using that part of the lemon grass which is closest to the root, the white part, chop roughly.

Place all the ingredients of the marinade in a food processor and mix well.

Taste your marinade. It should have a combination of sweet, salty and spicy, but should lead with sweet and salty for the best results when cooked.

Adjust the seasoning using the fish sauce for salty or sugar for sweet.

Add some more chilly powder if you like it spicy.

Strain the marinade through a sieve as the lemongrass tends to be a bit fibrous.

Marinade the chicken strips in this.

Even an hour is sufficient to marinade but 24 would be great!

When ready to cook, thread the meat onto the damp skewers.

Grill on a BBQ or in an oven.

I do it under the grill in my oven. 5 mins on one side and then another five after turning them over.

When you turn them over, baste with the remaining marinade.

Do not overcook or it will end up very dry.

Enjoy your satay with a peanut dipping sauce.

Somehow I feel a BBQ will take the Satay to a different level, but I make do with a gas grill.

;

;


;

;

Peanut Butter Satay Sauce.

;

Now I am not one to use packaged ingredients in my cooking……and I turn my nose up at shortcuts of the ‘packaged kind’.

But when I needed to make a dipping sauce for the satay, I needed peanut.

Unfortunately I did not have any in stock.

Fortunately I did have ‘Peanut Butter.’

Something I had bought to experiment with in my baking. It however seemed to have found another calling in my kitchen…..Satay Sauce.

;

3/4 cup Peanut Butter ( the type that I used still has a few crunchy bits left in)

1/3 cup water

2 cloves garlic

1/2 tsp dark soya sauce

2 tsp sesame oil

2 tbs palm sugar or brown sugar

2 tsp fish sauce

1/2 tsp lime juice or tamarind paste.( I just use lime juice here)

1/2 tsp chilli powder

1/3 cup coconut milk

;

Once again, easy-peasy.

Just chuck everything into a mixie/food processor and blend away!

Taste and adjust seasoning, using fish sauce for salt, lemon for tang or some more brown sugar for sweetness.

This sauce is just great. It thickens as it sits, so just add a little coconut milk or water if you need it thinner.

It will stay in the fridge for a couple of weeks and works really well as a dip or sandwich spread.

;

These recipes are just up my street.

Throw everything together, blend and TAA DAA………..Finger lickingly, skewer gnawingly, lip smackingly delicioso…….

SATAY………..

Enjoy!

Jo

;

;

;

;

Perfecting Phad Thai

Standard

My 7 year old came home one day pleading with me to learn from her friend’s Mom,how to cook ‘phad thai’…..”its the most delicious, ‘awesomest’ noodle I’ve ever eaten!” she said.

Isn’t it curious how kids just love what they ate at someone else’s house? (I don’t know about yours, but my kids are pro’s at this.) Never mind that it is our standard order at our favorite Thai restaurant, ‘Benjarong’, here in Chennai.

Like any good Mom, I called up the expert “pad thai-ing” Mother. She gave a recipe using peanut butter, imli (tamarind)chutney and ready Thai red curry paste.

Now I’m sure this made a very tasty Phad Thai….but the food snob that I am, I thought, “What! Not from scratch?”

It took me a few weeks, but I dragged myself to the computer and trawled the net for Phad Thai recipes.

Now there are thousands, if not more, varieties of Phad Thai recipes. But very few seemed to be ‘authentic’ to me.

Many of them used all kinds of packaged ingredients, but then I chanced upon a blog http://chezpim.com where

Pim shares her secrets to the best Phad Thai.

Phad Thai needs to have 4 flavours:

1.Salty (fish sauce)

2.Sweet (palm sugar)

3.Spicy (chilly powder)

4.Sour (tamarind pulp)

The recipe I follow belongs to Pim, I make a larger quantity as it stays beautifully bottled in the fridge.

My kids love it in their lunch box and it works for me as well because I have a fingerlickingly good ingredient on hand all the time.

PHAD THAI SAUCE:

1/2 cup tamarind pulp ( start with less and add to taste)

1/2 cup palm sugar

1/2 cup fish sauce

1 tsp chilly powder

Put all the ingredients in a pan and bring to a gentle boil. Simmer till very slightly thickened and the palm sugar dissolved.

I like my sauce a little sweeter. Play around with the ingredients till you find the balance that is right for you.

( add less tamarind to begin with and keep adding more after tasting)

Strain the sauce as the palm sugar almost always has some grit in it.

Cool and keep it in a jar in the fridge.

Jo’s Phad Thai…..Full of veggies and protein so it’s a complete meal!!

(Once again I may not be preparing the most authentic version but rather a wholesome meal with what I have on hand)

1/2 packet of Rice Sticks

1 stalk celery, chopped fine

3-4 spring onion with leaves, chopped ( if I don’t have this, I use sambar onions/shallots or just plain old onion)

1 Carrot, julienne

A handful of French Beans, julienne

1/2 leek cut fine

1 cup cabbage, julienned

1-2 chicken breast, sliced

15- 20 prawns (optional)

Tofu(….if you like it…if used cut in cubes and fry before using)

1 cup Beansprouts

2 eggs

Oil

Salt

1/4 cup chopped peanuts

Lemon

The How To:

1.Boil up a pot of water. Take off the stove and soak the rice sticks in the hot water. Add a little salt to taste.

Cover.

Do not keep it for too long, just until the rice sticks are al dente.

Once done, drain in a colander and run cold water over it to stop the cooking process.

2.Heat a wok and add in some oil.

Make a thin omelette with the 2 eggs. When done cut it into strips and keep aside.

3. Heat some oil and toss in the sliced chicken along with a spoonful of Phad Thai sauce. Saute till done and keep aside.(repeat the same procedure if you are using prawn as well)

4.Heat some more oil and add in the chopped celery, sautee for about a minute.

5.Add in the onions, fry till they begin to change colour.

6.Add in the carrots and beans, sautee. ( I normally have a problem with the beans, so at this stage I cover the wok for a few seconds so that steam can help the beans along.)

7.The cabbage and leeks go in next.

Cook the veggies so that they are 3/4 done and still retain a bite.

8.Toss in the cooked chicken and stir fry.

9. At this point divide the veggie chicken mixture into 2 portions.

Keep one portion in the wok, add in half the cooked drained rice sticks.

10. Add in the Phad Thai sauce to taste.

11. Sprinkle with chopped peanuts and add a squeeze of lime.

12.Then do the same with the other half of the veggies and rice sticks.

13. Serve garnished with the omelette strips. ( My kids prefer the egg like this….but you could also push aside the

chicken /veggie mix to one side of the wok and scramble the egg on the other half, once cooked mix it all together.)

Important tips to remember when making Phad Thai I picked up from Pim http://chezpim.com

* Soak the noodles/rice sticks till al dente only.

* Make small quantities of noodle at a time.

(Making smaller batches makes it easier to mix evenly. When you try to make a large batch in a hot wok, by the time you mix all the elements together, the noodles overcook. )

*You can keep the excess sauce bottled in the fridge.

Enjoy your Phad thai with a starter of Chicken Satay………recipe coming soon!! Watch this space!!

Where to find what in Chennai

Fish Sauce – Blue Elephant, Nilgiris, Mercado, Amma Nanna

Palm Sugar- Nilgiri’s, Econut

Rice Sticks- How How Brand, Nilgiri’s, Mercado

Tofu- Nilgiri’s

Celery and Leek- Veggie vendor outside Nilgiri’s Adyar, Besant Nagar and Cathedral Road.